Text case conversion in Excel is not just an aesthetic preference but a necessity for data standardization, especially when text data comes from various sources with inconsistent formatting. Whether it’s standardizing text data for consistency, preparing reports, or ensuring data quality, these functions play a critical role. By the end of this post, you’ll learn how to use these functions effectively.
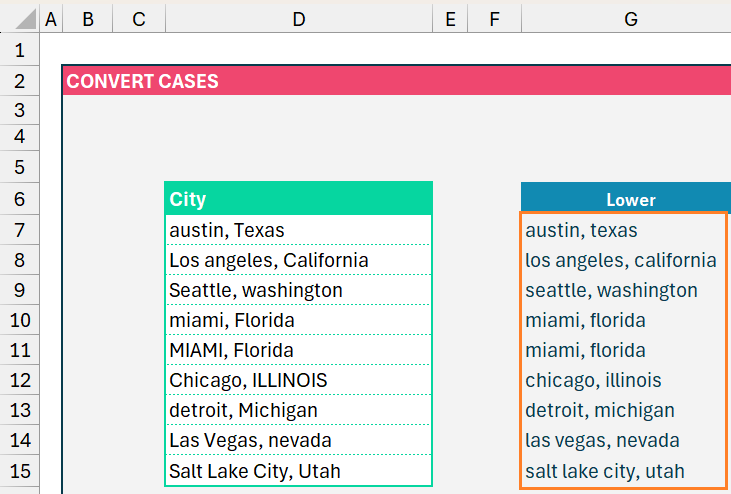
Consider a sample dataset of city names as below from cell D7 onwards:

Now let us see how to use the built-in Excel functions to convert cases of our sample data quickly and easily:
Lowercase Conversion: To convert city names to all lowercase, we use the LOWER function. The formula in cell G7 would be
=LOWER(D7)Drag the formula to the last cell corresponding to the sample to get the lower cases. The resulting data would look like this:

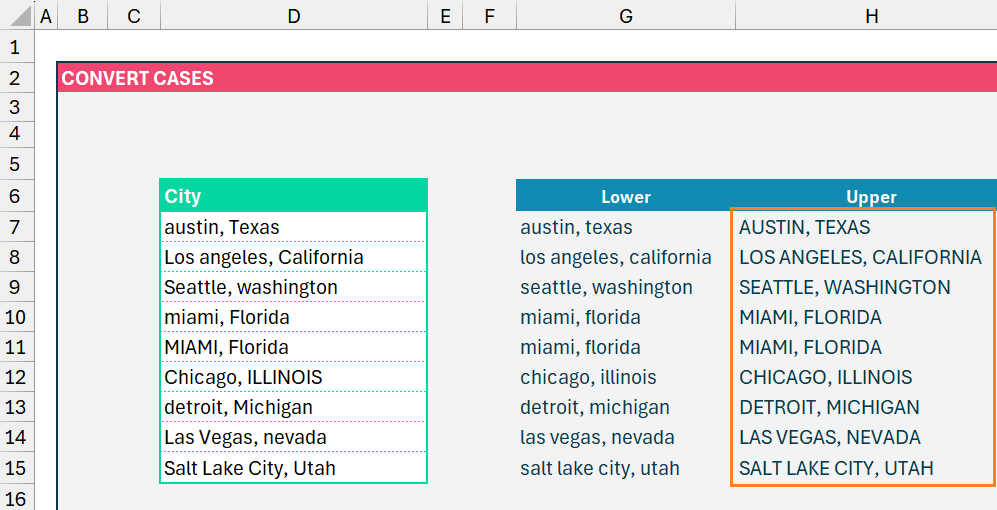
Similar to the lower case conversion, to transform city names to all uppercase, we use the UPPER function in cell H7,
=UPPER(D7)The resulting data which is converted to upper case will be:

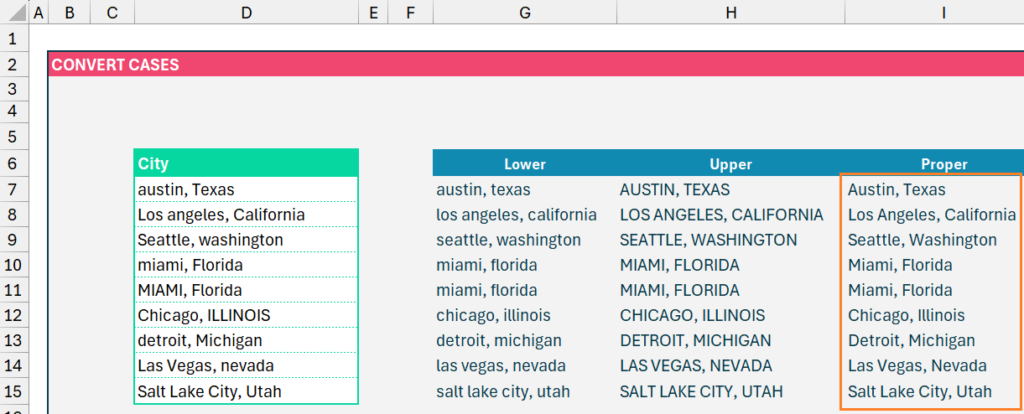
Similar to the above, use the Proper function to get the city data in the proper case.
=PROPER(D7)
What if you want to choose the case conversion based on a specific condition dynamically? Enter the SWITCH function.
Dynamic Case Conversion
Suppose you have a scenario where the case conversion depends on a particular cell’s value (e.g., a dropdown menu in cell J6 with “Lower”, “Upper”, and “Proper”).

Now, let’s apply the same within a SWITCH function to dynamically choose based on input from J6:
=SWITCH($J$6,"Lower",LOWER(D7),"Upper", UPPER(D7),"Proper", PROPER(D7),D7)The syntax of the SWITCH function is,

In the input cell, if the first value is present then return the first result, and so on…
Note: The SWITCH function is available only in versions of Excel 2019 or Excel 365 subscriptions.
The result will be a dynamic case conversion:

Check our dedicated, step-by-step video for case conversion in our YouTube channel:


