User Guide: How to enter data in Recruitment Manager Template?
In this article, we will discuss step by step how to use the Recruitment Manager Excel Template.
DESIGN
The template focuses on two key pieces of input information – Jobs and Applications, entered in Jobs and Application sheets respectively. There are two key output sheets. The Dashboard presents a single page summary of Recruiting metrics, with several ways to filter/drill down. The Job Report sheet allows choosing one job to see the details of that specific job.
OVERVIEW OF STEPS
- Enter info. In Settings sheet (Recruitment Stages, Application Sources and Decline Reasons)
- Enter information of jobs to be filled in the Jobs sheet.
- Enter every application you receive in the Applications sheet.
- As you evaluate each application and move it from one stage to next, enter the date in Applications sheet.
- When a final decision is made on a candidate, enter ‘HIRED’ or ‘NOT HIRED’ in the Application Status column. Enter the Decline Reason if the candidate was not hired.
- When a Job order is completely filled, enter in Jobs sheet: ‘COMPLETED’ in the Status field and cost of filling the Job in Cost field.
- View Dashboard anytime to view the performance of recruitment process (Press Ctrl+Al+F5) to refresh calculations.
- View Job Report sheet for the summary of comments on Candidates for one job at a time.
- (Optional) Use Candidates sheet to store information about candidates.
DETAILED STEPS
STEP 1: Enter Settings information
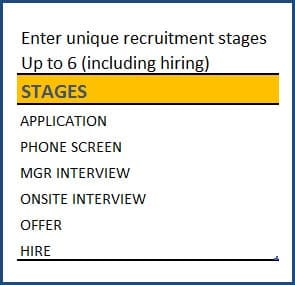
Recruitment Stages: The template can accommodate up to 6 stages in recruiting process. If you have only 4 stages, just clear the last two values.
Application Sources: This will be the list of sources where you receive applications. You can customize the list as needed. Enter up to 15 sources.

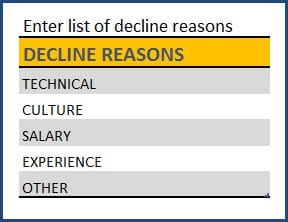
Decline Reasons: This will be the list of reasons we provide when decide not to hire a candidate. You can customize the list as needed. Enter up to 15 reasons.
STEP 2: Enter Jobs
In the Jobs sheet, you will enter each job in a new row with the following information.
Fields available: JOB ID, JOB TITLE, JOB LOCATION, HIRING MANAGER, DEPARTMENT, JOB TYPE, JOB LEVEL, RECRUITER NAME, JOB POSTED DATE, POSITIONS, STATUS, COST
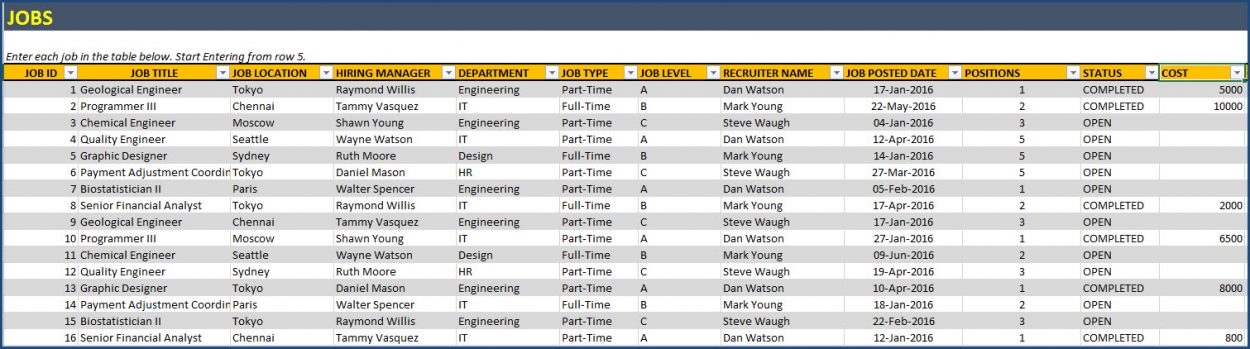
Most fields are self-explanatory. The last three need some explanation.
Positions: This template can handle multiple openings of same title. For example, if you have 3 openings for Graphic Designer, you can enter them in one row and enter 3 in Positions field/column.
Status: When you enter a new job to be filled, enter ‘OPEN’ as Status. When all the positions for that job are filled, enter ‘COMPLETED’ as Status. If the job is cancelled, enter ‘CANCELLED’.
Cost: After the job is filled, enter the total cost incurred in the recruiting for that job.
STEP 3: Enter Applications
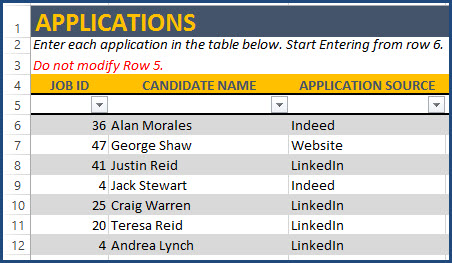
Enter each application you receive as a new row in the APPLICATIONS sheet. Start entering from Row 6. Please do not modify Row 5, as it will break calculations.
• Enter Job ID for which the application was sent.
• Enter Applicant name and the source through which you received the application.
STEP 4: Track Progress of Applications
In the next 6 columns, enter the dates on which the applicant crossed each of the recruitment stages.
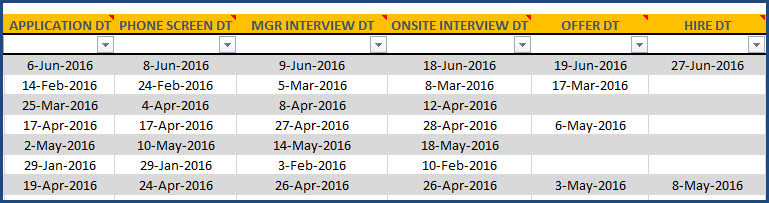
For example, in the image above, you can see the dates on which each candidate crossed the 6 stages. If a candidate does not reach a stage, please don’t enter anything in that column.
STEP 5: Update Application Status
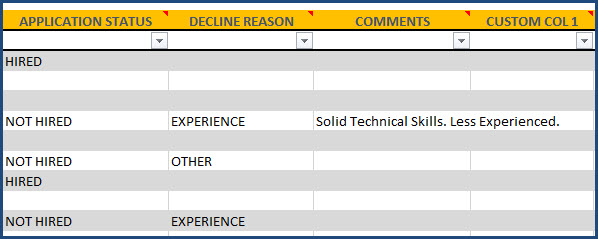
When a decision is made on a candidate, update APPLICATION STATUS column. Enter ‘HIRED’ if hired or ‘NOT HIRED’ if decision was taken not to hire the person. Enter the decline reason if the candidate was not hired. For example, if the candidate reaches the interview stage but does not get the offer due to ‘Technical’ knowledge , then enter ‘Technical’ as Decline Reason.
Please enter any comments or notes about the application in the COMMENTS column.
Error Checks
While entering data in steps 4 and 5 , please make sure that there are no errors. The template assigns applications as ‘ERROR’ (see column Q named ERROR) if one or more of the following conditions apply.
- Subsequent stage date is earlier. Example: Stage 2 Completion Date is before Stage 1 Completion Date
- Application Status = ‘HIRED’ and all stages are not completed.
- Application Status = ‘NOT HIRED’ and a stage is missing. Example: Stage 4 has Completion Date but Stage 3 does not have a Completion Date.
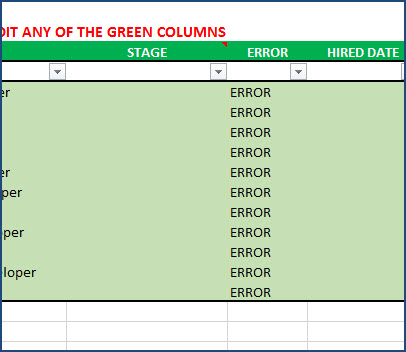
Those Applications with ERRORs will not be reported in Dashboard.
STEP 6: Update Job
When a job order is fully completed, go back to the Jobs sheet and update.
Status: When all the positions for that job are filled, enter ‘COMPLETED’ as Status. If the job is cancelled, enter ‘CANCELLED’.
Cost: After the job is filled, enter the total cost incurred in the recruiting for that job.
STEP 7: View Dashboard
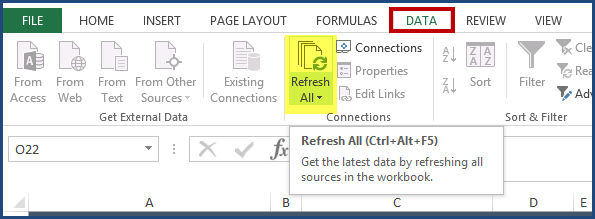
View Dashboard anytime to view performance metrics. The dashboard is fully automated. Since it uses pivot tables for calculations, we have to refresh it whenever we added/updated input data on Jobs and Applications. Please refresh it by (DATA ribbon –> Refresh All button) or keyboard shortcut (Ctrl+Alt+F5).
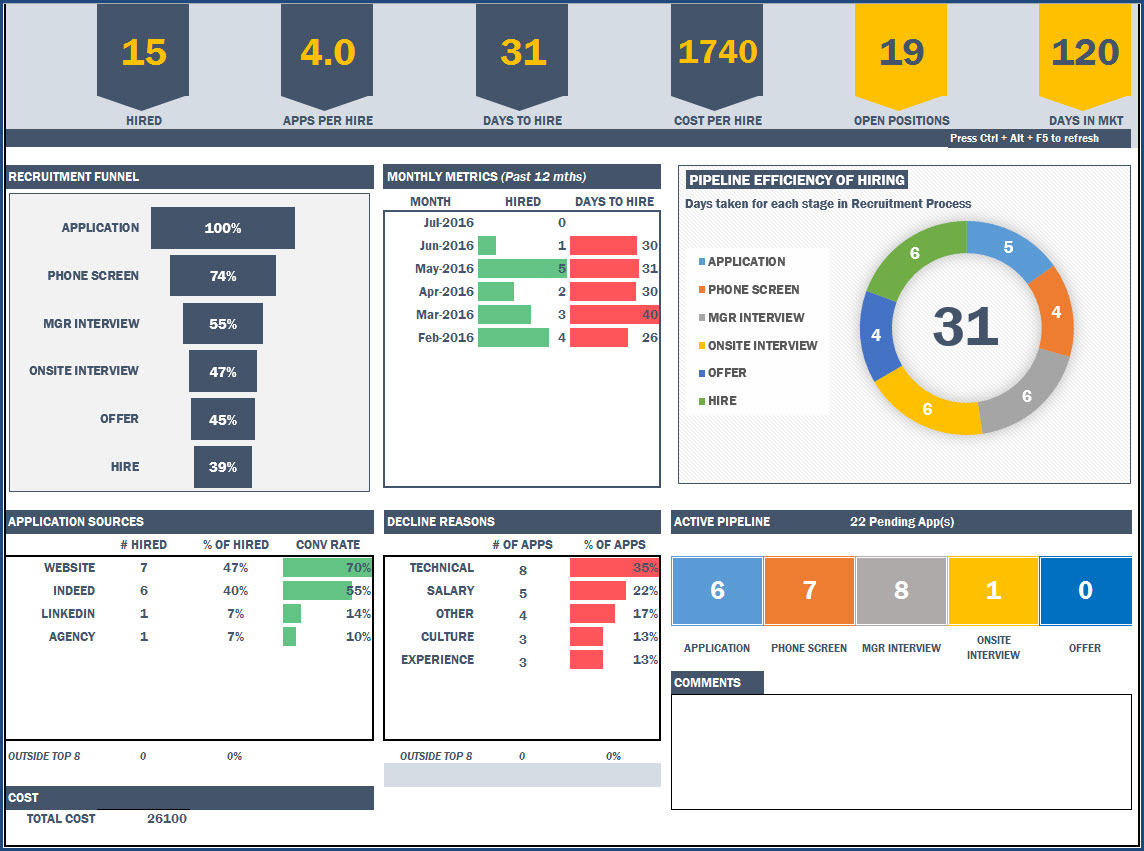
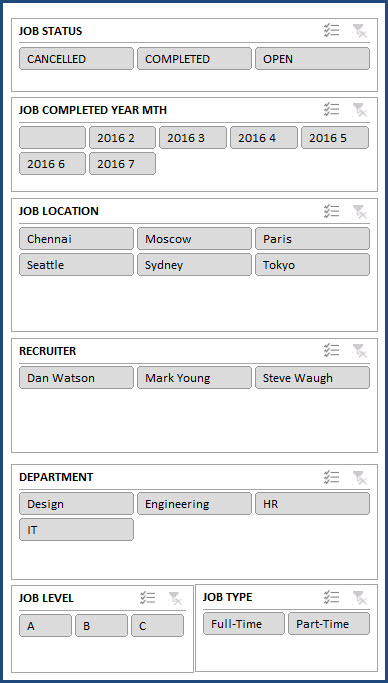
The dashboard is very flexible as it allows you to drill down using the filters. There are 10 filters/slicers available to analyze the data in detail and make smarter business decisions.
If the dashboard does not reflect the data entered, please refresh the calculations first. Then, check if there are ERRORs in the Applications (see column Q).
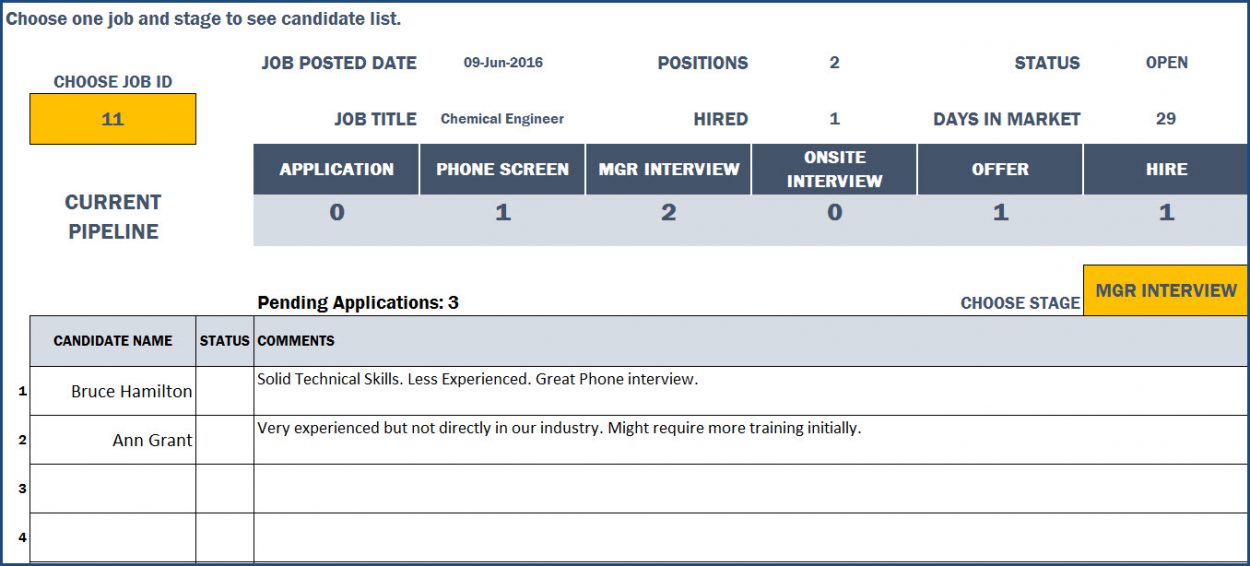
STEP 8: View Job Report
In the Job Report sheet, we can choose a Job ID and view all details for that one job. We can also see the Candidates and comments for each stage. This can be a useful tool to have a meaningful discussion with the stakeholders on the applications and thus take decisions.
STEP 9 (Optional): Enter Candidates’ data
The Candidates sheet available is optional. We can store candidates’ contact information and other notes such as Skills, Strengths and Weaknesses. We can add new columns as needed.
63 Comments
Hi,
What to do when there are a lot of applications?
Should the database be renewed after one year?
Thank you for using our template.
Currently, there is no limit in application tab but more number of applications like 10k or 20k, might affect the sheet’s loading time according to the system performance.
Having a separate template will be advisable if you are having a large number of applications received for one year.
Best wishes.
I need to unprotect the “View Job Report”
Hi, on my dashboard page the recruitment funnel is not working. I am showing no errors on the applications page. Thanks
We regret the inconvenience caused.
Requesting to check the below link to know the most common reason for the concern related to dashboard not getting populated:
https://indzara.com/2018/05/recruitment-manager-why-dashboard-not-updated/
If you are facing issue even after following all steps provided in the above link, requesting to share your sheet to support@indzara.com to check further.
Best wishes.
Hi ,
In the application (sheet) instead of dates can i put no of candidates shortlisted.
For EG.
Instead of phone screening can i put no of CV shortlisted, instead of MNGR Interview can i use MNGR interviewed , instead of Onsite interview can i use Test conducted.
Thanks for your message.
This template is designed keeping in mind that for each unique job id, you will receive several applications. We track the status of these applications and the dashboard is prepared. In present scenario, you will receive some applications for a particular job id, if just the number of applications is mentioned, then it will not calculate the stages at which an application reached in the whole process.
This will distort the dashboard readings too. The dashboard shows you the percentage of the application at each stage and you can apply slicers to filter the required data.
Best wishes
hi borher
at the Job Report sheet, how many records can take. its seems to me only 25 records.
how can i increase number of records.
Thanks for using our template.
The Job Report shows the number of candidates at a particular stage for one specific opening. We understand that this number will not be more than 25 at a given time. Hence the number of rows is 25.
However, you can extend the table down to accommodate more candidates.
Best wishes
Hi, my dashboard page is not adding up correctly. I’ve been through all the steps and there are no errors in the other worksheets. The filters are also not showing on the dashboard. Haaallppp! Thanks, Jen
Thanks. If you have already tried the steps provided in https://indzara.com/2018/05/recruitment-manager-why-dashboard-not-updated/, please email file to support@indzara.com
We will review and address your questions.
Thanks & Best wishes.