2024 New Employee Checklist – Free Excel Template
This Excel template is designed to document completion of activities in a checklist. HR departments in companies can use this to track or document new employee on-boarding activities. Typically, there is a list of activities that each employee has to complete to ‘on-board’ to the new company. We can use this one file to track such on-boarding for all employees.
This Excel template is designed for Microsoft Excel, but if you are looking for a Google Sheet template, please visit New Employee Checklist in Google Sheets.
Benefits of New Employee Checklist template
- Customize activities for your business (maximum 12 activities)
- Printable checklist for each employee
- Choose whether to print dates
- Customize header with ordering fields as you prefer
- Rename fields as needed (except the activity dt fields)
- Customize footer with your business information
- % Complete progress bar
- All employees’ data in one file
Free Download
Requirements
Microsoft Excel for Windows (2010 or above); Microsoft Excel for Mac (2011 or above);
Video Demo

How to use a new employee checklist in Excel?
The template has three sheets – Settings, Employees and Print. It uses Excel tables feature to store information.
If you are new to Excel Tables, please see article (with video) on Excel tables.
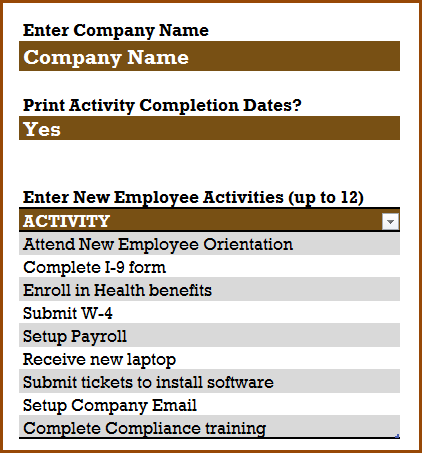
Settings
In the Settings sheet, let’s enter company name. If we don’t want to print activity dates, then choose No to that.
Finally, enter the list of activities.
Employee Data
In the Employees sheet, let us enter each employee and their information.
Tip: If you would prefer to print empty checklists and check items in the hard copy, then skip entering the Employee Data and directly move to Print step below.
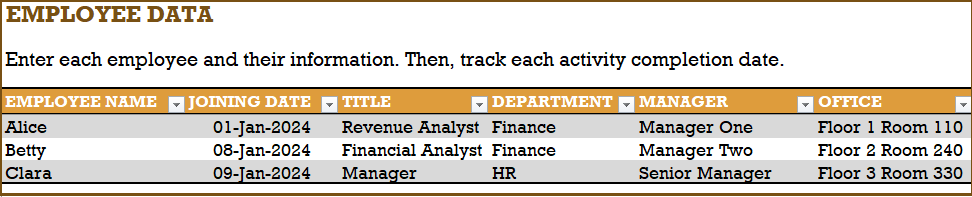
These fields can be renamed as needed.
Then, we enter the activity completion dates for each employee, as they complete the activities.

Please do not rename these date fields, as they will impact the formulas used.
In the Print sheet, we can print the certificate for each employee separately by choosing the employee name.
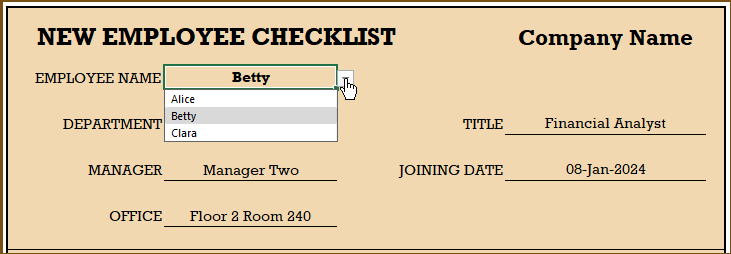
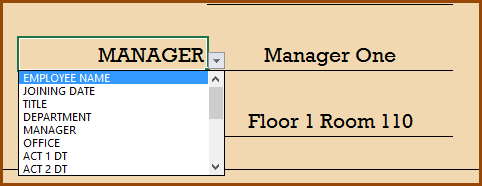
We can change the fields in the header by using the drop down. This allows us to re-order fields to suit our needs. Also, if you had renamed the employee fields earlier, they will automatically appear here. 🙂
If you need to change the format of any of the cells (for example date to text or text to date), just select the cell and press Ctrl+1 to open the format cell dialog box.
There is no need to change the Activities section of the certificate.
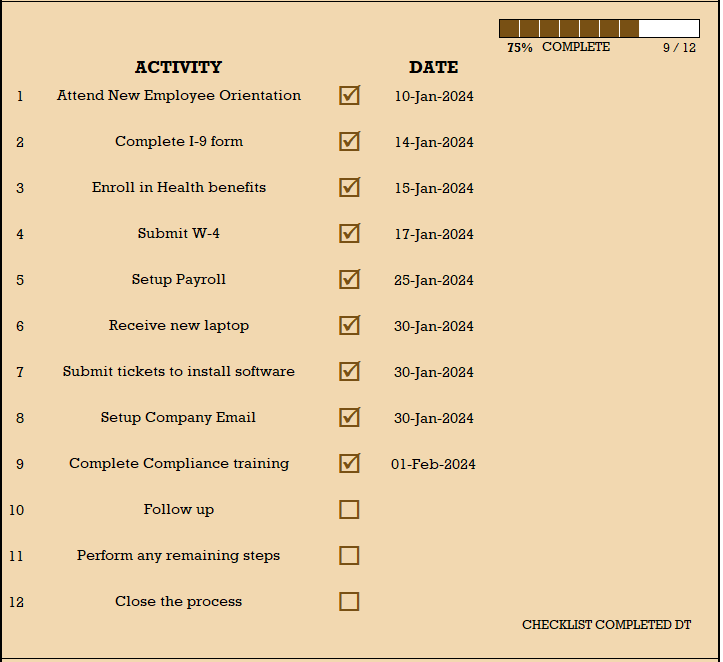
At the end of the activities section, a Checklist Completed Dt will appear if the employee has completed all activities.
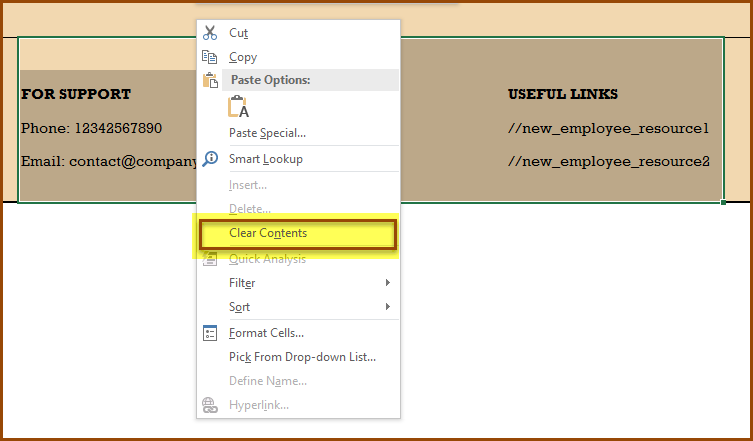
We can customize the footer area by providing contact information for your business and any internal links for reference for new employees. There are no formulas here. We can just type directly.

If you prefer to not have anything, you can select the cells, right click and clear contents.
Now that you have the certificate customized, we can print (Press Ctrl+P to print) or export to PDF using Excel’s built-in options.
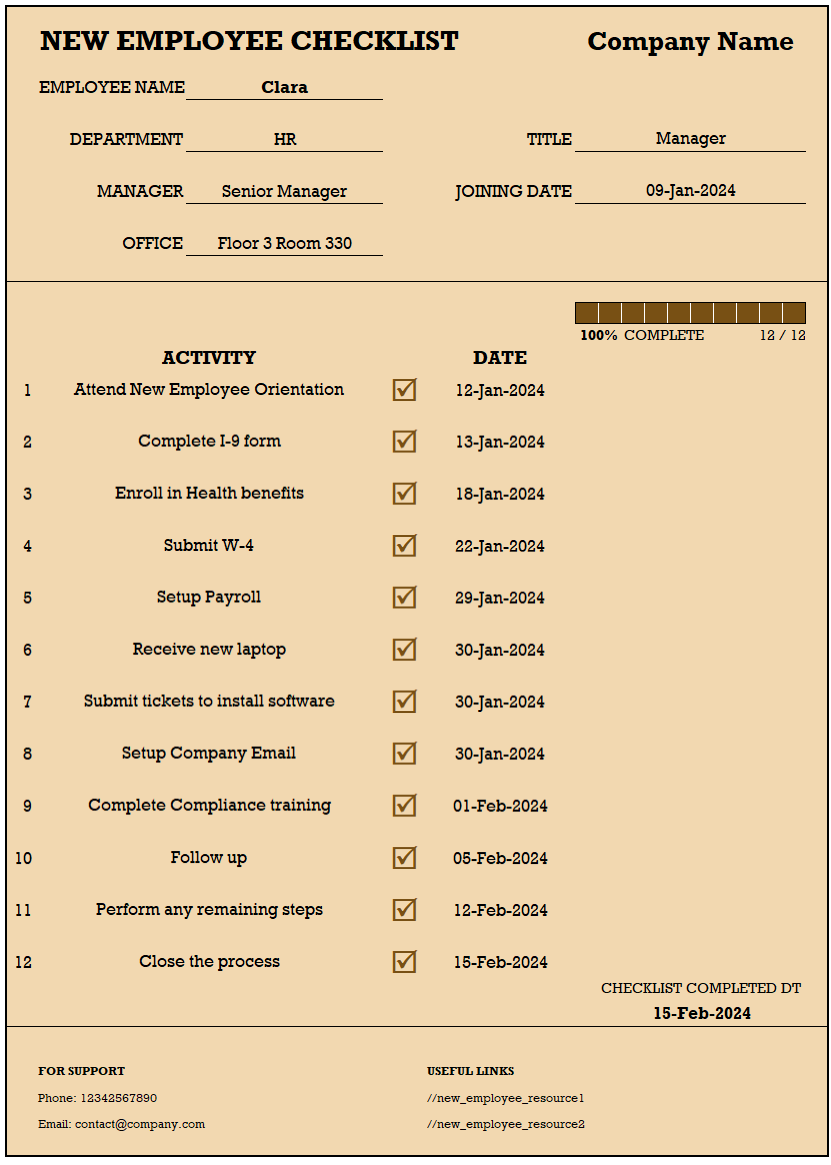
The following are a couple of sample certificates printed.
Related Free Templates
Recommended Template
Related HR Templates
-
 Compliance Training Dashboard Excel Template$40
 -
 HR KPI Scorecard & Dashboard$50
 -
 Employee Retention Dashboard Excel Template$50
 -
 Recruitment Tracker Dashboard Excel Template for Simplified Hiring ProcessOriginal price was: $89.$69Current price is: $69.
63 Comments
My question is the same as Zubair. I would like to add more than 12 activities. Is this possible?
To add more activities, it would require the following steps
1. Add 13th activity in Settings sheet
2. Add a column to table in column S in Employees sheet. Type ACT 13 DT in cell S3.
3. Unprotect PRINT sheet using indzara as password.
3. Copy rows 41 and 40. Insert Copied cells above row 42.
4. Edit formula for the cell B43. In the formula, replace 12 with 13.
Follow the above steps to add more lines.
Best wishes.
Hi,
The worksheet is a great tool to track the check-in process – thanks for sharing it. Would you please let me know if it is possible to add more than 12 activities. Also when I add activity No. 10, 11 and 12, the serial numbers do not update on the print sheet and I rather get a # sign. Is there a way to fix it. Your assistance is really appreciated.
Best Regards.
Thank you. First – about the 10, 11, and 12 not showing correctly. This is due to the column width being narrower. You can widen column B to show the numbers fully. If you don’t see column header, click on View ribbon and check the box for ‘Headings’. I have made this change in the file and uploaded above. If you download the new file this issue should not exist.
To add more activities, it would require the following steps
1. Add 13th activity in Settings sheet
2. Add a column to table in column S in Employees sheet. Type ACT 13 DT in cell S3.
3. Unprotect PRINT sheet using indzara as password.
3. Copy rows 41 and 40. Insert Copied cells above row 42.
4. Edit formula for the cell B43. In the formula, replace 12 with 13.
Follow the above steps to add more lines.
Best wishes.
This is really helpful. Can’t thank you enough.
Best Regards
Glad to hear. You are very welcome. Best wishes.
Hi,
Good job on this sheet sir!
Just 1 question, how can i change the Date to General format on the Certificate?
if few items on the list does not involve dates;
sample: COMPLIANCE TRAINING: PENDING
Thank you.
The display format can be changed by just selecting any cell on the PRINT sheet and change the number format.
However, for calculations to adapt to non-dates, we need to modify formulas as well.
Best wishes.
hi how can i change the color of completion bar? currently it is set to brown
Please select one of the cells in the completion bar and then open the conditional formatting menu – rules manager. There is a rule where we apply the color. Please edit the rule and change color as needed.
Best wishes.
Thanks alot….appreciated for your effort and helping people sort out there issues.
Regards,
You are very welcome. Best wishes.
Can i please know the password to unlock the sheet for editing?
Please use password indzara to unlock. Thanks.
Wonderful, Amazing; I am really short of words, this is one of the tool which can keep the policy & actual process in place, best tool for audit purpose
Thank You!! God Bless
Thanks for the kind words. Glad to hear that it is useful. Best wishes.
Thanks for u this useful for HR and F.M
Thank you. Best wishes.
That is so good HR form i have seen before
Thank you for the feedback. Best wishes.
This is very useful of my job for this sheet.
I am very glad to hear. Thanks for taking the time to provide feedback. Best wishes.